
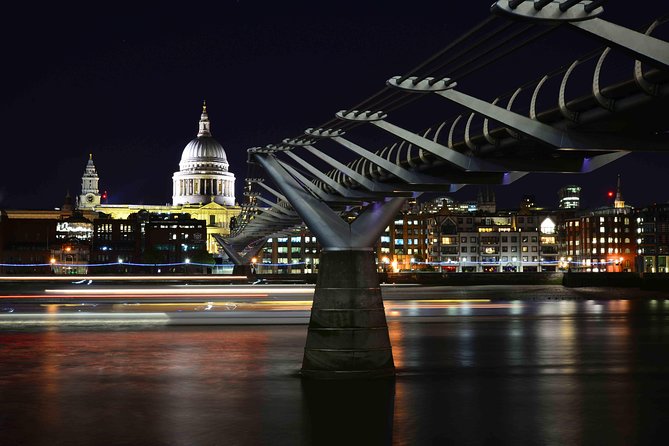
Reviewed · PHOTOGRAPHY SESSIONS
Private Night Photography Tour in London
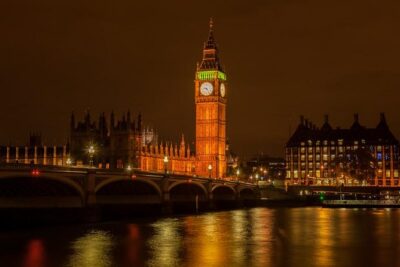
London after dark gives you more than pretty lights. It gives you moving car trails, glowing landmarks, reflections on the Thames, and boats that smear into soft ribbons when you use a long exposure. David’s personal instruction is the main attraction here, with camera help tailored to your skill level and gear.
I like that you can bring a DSLR or simply use your phone, and I like the mix of famous sights with tucked-away angles around the river and City. The main consideration is equipment: serious long-exposure work is much easier with a tripod, and the advertised duration varies slightly between roughly two and a half and three hours.
Key points to know
- David is the guide and photography teacher, helping with composition, camera settings, and creative low-light techniques.
- You can use a smartphone, DSLR, or other camera, so you do not need expensive gear to join.
- The London Eye, St. Paul’s Cathedral, and Tower Bridge provide strong night scenes and varied shooting conditions.
- Long exposures create the tour’s signature effects, including light trails, blurred boats, and smooth reflections.
- The included e-guidebook gives you tips to use after the walk, including for ordinary daytime photography.
- The private format needs clarification, since the activity is sold as private, while one account describes a small shared group.
London after dark is the real subject
This is not just a sightseeing walk with cameras pointed at landmarks. The city becomes your practical photography classroom.
At the London Eye, you work with bright architectural lines and moving light. Along the Thames, you can frame reflections, passing boats, and traffic trails. Around St. Paul’s and the City of London, you get stone buildings, narrow viewpoints, and changing light. Tower Bridge then gives you one of the strongest night scenes in town, with its illuminated structure and river setting.
The goal is not simply to collect a postcard view. David shows you how small changes in exposure, focus, framing, and shutter speed can alter the mood of the same scene. You may finish with a clean architectural photograph, a streak of red car lights, or an intentionally abstract image made by moving or zooming the lens during a long exposure.
That makes the tour useful even if the weather or light is not perfect. A clear night is attractive, but reflections after rain can add another layer to the image. One participant had rain during the walk and still found the evening productive. Bring suitable clothing, though food and drinks are not included.
More photography sessions in London:
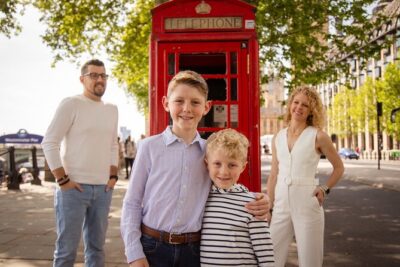
- Professional Photoshoot in London Photographer
★ 5.0 · 102 reviews - Private landmarks photoshoot for families and couples
★ 5.0 · 92 reviews - Professional Private Photoshoot in London
★ 5.0 · 63 reviews
Meeting David near Westminster
The tour begins at Caffè Nero, Unit B, Portcullis House, 1-2 Bridge Street, London SW1A 2JH. This puts you near Westminster and the Thames, a sensible starting point for an evening that moves through several central London areas.
You should arrive with your camera charged and ready. A low battery can become a real problem once you start working with the screen, flash, and repeated long exposures. One participant’s camera battery died during the tour, but switching to an iPhone turned into a useful second lesson in smartphone photography. That is a good reminder to bring a spare battery or power bank if you have one.
David’s teaching style is practical. He begins with camera controls and technique, then applies them in the city. Beginners can learn what the main settings do, while more experienced photographers can test ideas such as multiple exposures, light trails, and zoom effects during a long exposure.
The instruction is not limited to one brand. David has worked with many kinds of cameras, though one participant with a Fuji camera found that knowing the camera’s menus personally was helpful. If your camera is unfamiliar to you, spend a few minutes before the tour learning how to change shutter speed, aperture, ISO, focus, and timer settings.
Stop one: London Eye and riverside light
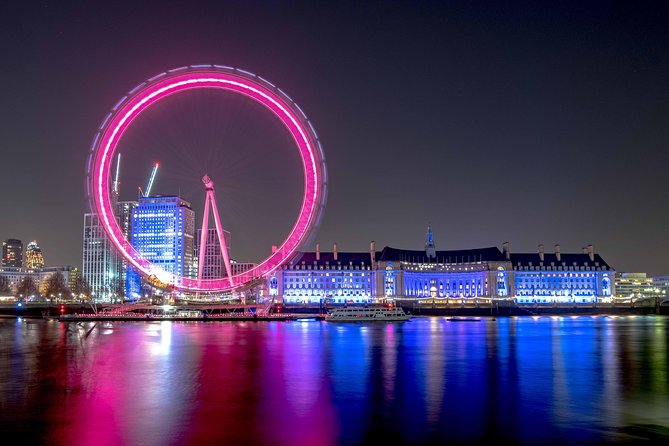
The London Eye is a strong opening stop because it combines a fixed subject with constant movement around it. Its wheel, capsules, bright lights, and position beside the Thames give you several ways to frame the same scene.
A standard photograph might show the complete wheel against the night sky. A longer exposure can smooth the movement of the capsules, pick up passing traffic, or bring out reflections along the river. You may also work with light streaks and creative effects, rather than treating the Eye as a single landmark that must fit neatly in the frame.
This is where a tripod matters most. Holding a camera by hand for a long exposure usually produces blur, while a tripod lets you keep the structure sharp and use a slower shutter speed. A smartphone with a suitable night mode can also produce good results, but the exact controls depend on the phone.
The riverside setting gives David room to discuss composition. You can place the Eye off-center, use the water as a reflective foreground, or include the movement of people, boats, and cars. The best lesson here is that a landmark photograph improves when you pay attention to what surrounds the landmark.
Stop two: St. Paul’s Cathedral in low light
St. Paul’s Cathedral offers a different problem. Its dome and stone details reward careful exposure, but strong artificial light can make parts of the building look too bright while darker areas lose detail.
David can help you balance those competing tones through shutter speed, aperture, and ISO choices. This is also a useful setting for discussing focus and framing. A wide view may include more of the surrounding City, while a tighter composition can make the dome or architectural detail the main subject.
At St. Paul’s, a tripod gives you time to keep the image sharp without forcing the ISO too high. A lower ISO often produces a cleaner file, especially if you plan to edit the photograph later. Smartphone users can still learn the same basic ideas: hold the phone steady, watch bright areas, and look for a composition that uses the available light instead of fighting it.
The stop is not only about taking the obvious front-facing picture. David guides you toward less expected angles and smaller details. Those choices help you build your own eye, which is more useful than copying one fixed viewpoint.
A few more things to do in London worth a look
- The Premier Classic London: Private 4-Hour Tour in a Black Cab
★ 5.0 · 2,737 reviews - Stonehenge Inner Circle Private Tour from London with Bath Visit
★ 5.0 · 1,909 reviews - Private Tour: Black Taxi Tour of London
★ 5.0 · 1,153 reviews - Private London Arrival Transfer – Airport to Hotel / Accommodation
★ 3.5 · 1,085 reviews
Stop three: the City of London and moving light
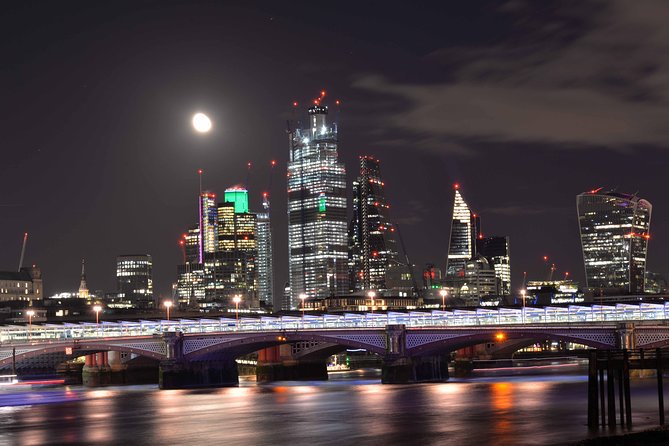
The City of London adds traffic, office buildings, hard lines, and pockets of shadow. This is the part of the route where the city itself becomes active photographic material.
Car headlights and taillights can turn into long ribbons across the frame. A passing vehicle can either ruin a picture or become the feature of it, depending on when you press the shutter. David demonstrates how to use movement instead of waiting for the streets to become perfectly still.
You may also try special effects by zooming the lens during a long exposure. This creates lines that pull toward or away from the center of the image. It is not an everyday technique, but it gives you a way to make an image that feels more personal and less like a standard city postcard.
Another possible lesson is multiple exposure photography. One participant learned that their camera could combine several exposures into one frame. Camera menus vary, so David may not know every control on every model, but he can explain the photographic idea and help you find a workable method on your equipment.
This section is especially useful for photographers who already know basic exposure but want more creative options. Beginners should not feel left out. The same location also allows simple practice with steadiness, framing, and light.
Stop four: Tower Bridge and the Thames
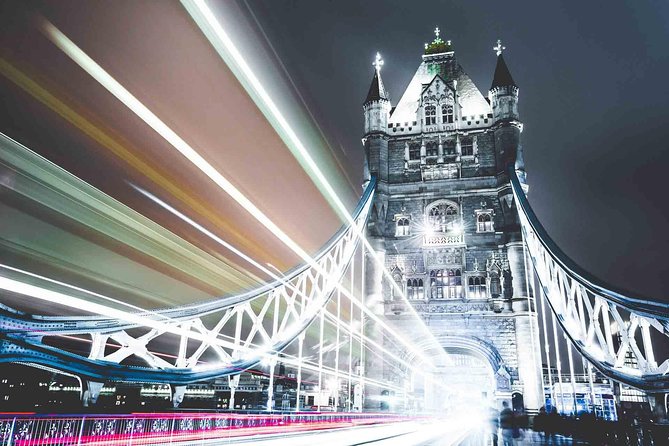
Tower Bridge provides the grand finish. Its illuminated towers, suspension lines, river reflections, and passing boats give you a clear chance to combine the techniques from earlier stops.
A long exposure can make the water look smoother and turn a boat into a soft blur. Reflections may stretch across the river, while traffic creates lines near the bridge. You can also choose a faster shutter speed to preserve sharper movement, giving you a direct comparison between different settings.
This is a good point to review the difference between a technically sharp image and a creative image. A perfectly frozen boat is not always more interesting than a blurred one. David’s role is to help you decide what effect suits the picture rather than simply telling you to use one correct setting.
Tower Bridge is also a place where composition can become crowded. Bright lights, dark water, traffic, and architectural detail all compete for attention. You may need to simplify the frame or choose one feature as the main subject. That kind of decision will help you with future city photography long after you leave London.
What David teaches during the walk
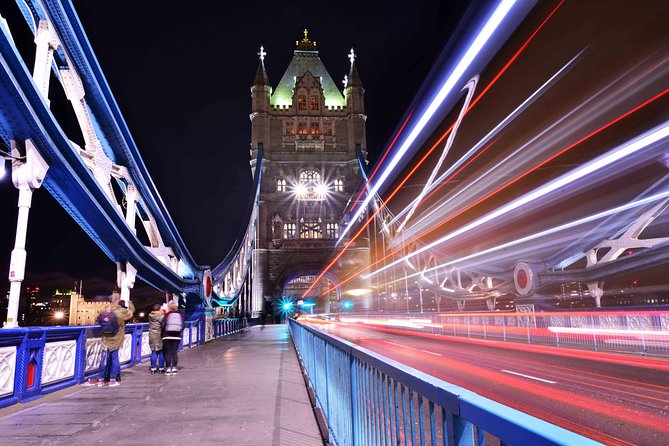
The most praised part of this experience is David’s instruction. His approach combines camera operation with visual judgment, so you are not just copying settings from a teacher.
You can expect help with:
- Choosing shutter speed for sharp images or motion blur
- Adjusting ISO and aperture for night conditions
- Using reflections along the Thames
- Creating car-light trails
- Photographing moving boats
- Framing famous landmarks from less obvious angles
- Using a zoom effect during a long exposure
- Exploring multiple exposures when your camera allows it
- Getting better results from an iPhone or other smartphone
- Making small changes that alter the whole image
David is also described as patient, friendly, and attentive. That matters on a technical tour. Night photography can involve menus, unfamiliar buttons, and repeated trial shots. You need a guide who can explain the same idea in more than one way without making you feel rushed.
The instruction continues beyond the walk through the included photography e-guidebook. That is a useful extra because the lessons can be easy to forget once you are back home. The guidebook also makes the tour more than a one-evening activity, especially if you use the tips for daytime travel photographs.
Camera, tripod, and fitness advice
You can bring a DSLR, mirrorless camera, compact camera, or smartphone. The tour is designed for all skill levels, from someone starting out to a hobbyist or experienced photographer who wants more practice with night scenes.
A tripod is strongly useful for the type of work described. One participant arrived without a tripod because airline baggage had been lost and was able to use a spare supplied by David. That was helpful, but you should not assume a spare will always be available. Ask before booking if you need one, or bring your own if practical.
A tripod may make the walk less convenient on public streets, but it gives you much more control. You can use lower ISO settings, longer exposures, and sharper architectural detail. Smartphone users may not need a full-size tripod for every shot, but a stable support still helps with creative night images.
The activity calls for a moderate level of physical fitness. You will move between several central London locations during the evening, carrying your camera and perhaps a tripod. Wear comfortable shoes and prepare for changing weather. The tour returns to the original meeting point, so you are not left at Tower Bridge or another distant stop.
Private format, timing, and value
The listed price is $164.52 per person, and the experience offers group discounts. For a private booking, that price can make sense if you want personal help with your own camera and a route shaped around your interests.
The real value depends on how actively you take part. If you simply follow David and photograph the landmarks, the cost is harder to justify. If you ask questions, test several settings, compare your results, and keep using the e-guidebook afterward, you are paying for a practical lesson as well as a guided evening in London.
The stated duration is approximately two hours and thirty minutes, while the description also refers to a three-hour night tour. Allow roughly that range when planning your evening. The route covers several locations, so time at each stop will be limited. You will get more from the experience if you arrive ready to shoot rather than spending the first twenty minutes searching through camera menus.
The activity is described as private, with only your group participating. However, one account describes a small shared group of three and specifically notes that it was not private instruction. If having David entirely to yourself is important, confirm the group arrangement before paying. This is the one practical uncertainty worth clearing up.
Who should book this photography walk?
This tour suits a first-time night photographer who wants direct help without signing up for a large class. It also works for a couple or family with different devices, since one person can use a Canon while another uses an iPhone.
It is a good match if you want to:
- Learn photography while seeing major London sights
- Improve smartphone night photography
- Practice long exposures in real city conditions
- Find better angles than the standard postcard view
- Learn settings on a camera you already own
- Leave with techniques you can use on future trips
Experienced photographers may also enjoy it, particularly if night photography is not their strong area. The instruction may be less useful if you already have extensive practice with long exposures, light trails, and multiple exposures, though the London locations and David’s local knowledge can still provide fresh ideas.
This is not the right choice if you want a relaxed sightseeing tour with no technical instruction. You will spend time changing settings, reviewing results, and trying the same scene more than once. That is the point, but it requires attention.
Should you book the London night photography tour?
Book it if you want to learn while photographing London’s best evening views, especially if you use a smartphone or camera without much confidence in low light. David’s patience, practical teaching, and ability to suggest unusual angles are the strongest reasons to go.
The price is easier to defend for a private group, and the e-guidebook adds lasting value. Bring a tripod if possible, charge your battery, dress for the weather, and confirm the exact group size and duration before booking.
Skip it if you only want a quick set of landmark pictures or if you dislike stopping to adjust camera controls. For everyone else, this is a focused way to see London through light, movement, and reflections rather than simply ticking off famous buildings.
FAQ
How long does the night photography tour last?
The activity is listed as approximately two hours and thirty minutes. Its description also refers to a three-hour tour, so you should allow roughly two and a half to three hours.
Where does the tour start?
It starts at Caffè Nero, Unit B, Portcullis House, 1-2 Bridge Street, London SW1A 2JH, UK.
Where does the tour finish?
The activity ends back at the original meeting point.
Which London sights are included?
The route includes the London Eye, St. Paul’s Cathedral, the City of London, and Tower Bridge. The photography guidance also covers views, reflections, traffic, and boats along the Thames.
Can I use a smartphone instead of a DSLR?
Yes. The tour is suited to smartphones as well as DSLRs and other cameras. The instruction includes smartphone techniques, including iPhone photography.
Do I need photography experience?
No. The tour is suitable for beginners, hobbyists, and experienced photographers. David teaches camera controls and low-light methods at different levels.
Should I bring a tripod?
A tripod is strongly useful for long exposures. One participant was able to use a spare tripod during the tour, but you should ask in advance rather than assume one will be available.
Is food or drink included?
No. Food and drinks are not included unless specifically stated.
Can I cancel for a full refund?
Yes, if you cancel at least 24 hours before the experience start time. Cancellations or changes made less than 24 hours before the start time are not accepted for a refund, and the cutoff uses London local time.
Just added in London
- The Beatles and a Secret pub★ 4.5 · 36 reviews
- The Beatles & Liverpool Magical Mystery Tour from London★ 4.5 · 80 reviews
- Airport Coach Service from Heathrow to Oxford★ 3.5 · 67 reviews
- The Beatles Magical History Black Taxi Tour London★ 5.0 · 51 reviews
- The Beatles London walking tour. From Abbey Road to the Roof Top★ 5.0 · 61 reviews
- Private The Beatles Taxi Tour in London★ 5.0 · 12 reviews
- The Beatles London Walk★ 4.5 · 120 reviews
- Dinner and Jazz Cruise on the River Thames★ 4.0 · 140 reviews
Photography Sessions, compared.
Professional Photoshoot in London Photographer
Read our review →
Browse the lists this tour appears in