
Reviewed · PHOTOGRAPHY SESSIONS
Discover Photography
The most useful thing about Discover Photography is its focus on the settings that make a real difference: aperture, shutter speed, and ISO. Instead of leaving you to guess what those dials do, the course connects each setting to the look of the final photograph, then gives you a practical exercise to try the effects yourself.
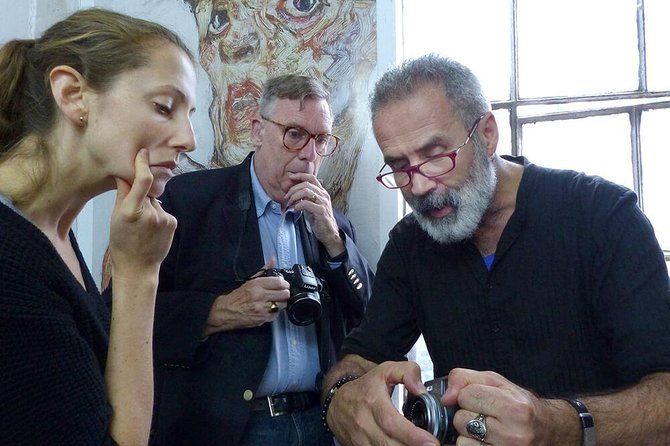
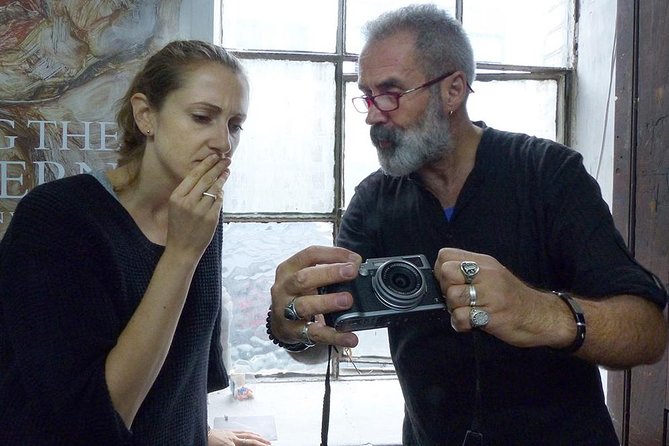
I like the small group limit of 12, which should leave room for questions, and I like that the course is taught by an award-winning photographer. Tutors including Vehbi Koca and Pierre are noted for clear explanations, patience, and a willingness to work with different cameras. The main catch is simple: you need a DSLR or compact digital camera with manual settings to get the full benefit.
Key points to know before booking
- A hands-on manual camera class: You learn how aperture, shutter speed, ISO, and exposure work together.
- A useful two-and-a-half-hour format: Long enough to cover the basics and practise, without taking a full day from your London plans.
- A maximum of 12 people: The group size is small enough for individual questions and camera help.
- Instruction from award-winning photographers: Tutors such as Vehbi Koca and Pierre explain settings in plain terms and encourage experimentation.
- More than camera buttons: The course also covers lenses, focal length, perspective, composition, colour temperature, and white balance.
- A good fit for manual camera owners: You will get the most from the class if your DSLR or compact camera allows manual control.
What you actually learn in 2 hours 30 minutes
This is a foundations course, not a specialist workshop for experienced photographers. You begin by getting comfortable with the camera itself, then move into the controls that decide how much light enters, how motion appears, and how much of the scene looks sharp.
The key lesson is exposure. You learn how aperture, shutter speed, and ISO affect one another, rather than treating them as separate menu items. That matters because a brighter picture is not always a better picture. A wide aperture may create a soft background, while a slower shutter speed may show movement. Each choice changes the photograph.
The course also introduces semi-automatic modes. These can be a useful halfway point if full manual control feels too much at first. You can learn what the camera is choosing for you, then take over one setting at a time.
That approach is practical for a London trip. You may want the camera to react quickly in changing light, but you may also want control over a portrait, a moving subject, or a scene with a very bright sky. Knowing when to use automatic, semi-automatic, or manual settings gives you more options than simply leaving the camera on its standard mode.
More photography sessions in London:
- Professional Photoshoot in London Photographer
★ 5.0 · 102 reviews - Private landmarks photoshoot for families and couples
★ 5.0 · 92 reviews - Professional Private Photoshoot in London
★ 5.0 · 63 reviews
Aperture, shutter speed, and ISO without the usual confusion
Many beginner classes throw technical terms at you and leave you with a list of notes. This one is built around the connection between settings and results.
Aperture controls the opening in the lens. It affects exposure and depth of field, which is the amount of the image that appears sharp. A wide aperture can help separate a subject from its background. A narrower aperture can keep more of the scene in focus. The course explains this in practical terms and includes an exercise on the effects of aperture.
Shutter speed controls how long the camera records light. A fast shutter can help freeze motion, while a slow shutter can create blur if the subject or camera moves. You are not just memorising numbers. You are learning why a photograph looks sharp, blurred, bright, or dark.
ISO affects the camera sensor’s sensitivity to light. The supplied course details place ISO within the exposure relationship, so you can see how it fits with aperture and shutter speed. This is especially useful when the light changes and one setting alone cannot solve the problem.
I appreciate this structure because it gives you a way to think through a photograph. Instead of asking which button to press, you can ask what effect you want, then choose the setting that helps produce it.
Lenses, focal length, and the way a scene changes
The course also covers lenses, focal length, angle of view, and perspective. These topics can sound technical, but they affect almost every picture you take.
Focal length determines how much of a scene fits into the frame and how large the subject appears. A wider angle can include more of a room or street. A longer focal length can bring a distant subject closer in the frame. The angle of view helps explain why two lenses can make the same place look very different.
Perspective is slightly different. It changes with your position as well as your lens choice. Moving closer or farther from a subject alters the relationship between objects in the frame. Understanding this helps you make more deliberate choices instead of swapping lenses at random.
You also learn how to make the most of each lens. That does not mean you need a large camera bag or expensive equipment. It means understanding the equipment you already own and using its strengths more carefully.
If your camera has manual settings but you have mostly relied on automatic mode, this part can make the whole camera feel more manageable. You are learning what the lens contributes, not just what the camera body does.
Composition and colour control
Technical settings are only half of making a good photograph. The course includes composition, so you also consider how to arrange the subject within the frame.
The supplied details do not promise a long walking route or a set list of London photo locations. Instead, the emphasis is on learning and applying the ideas during a practical exercise. That is worth knowing before you book. This is not primarily a sightseeing tour with a few photography tips added on. It is a camera class held in London.
Colour temperature and white balance are also covered. White balance helps the camera interpret the colour of light, which can otherwise make a photograph look too warm or too cool. Once you understand the idea, you can make more useful choices in different lighting conditions.
This is one of those settings many beginners ignore because automatic white balance often produces an acceptable result. Still, learning what it does gives you another way to correct a picture in the camera rather than trying to fix every colour problem later.
Same base, a different kind of day:
- Stonehenge, Windsor Castle, and Bath from London
★ 4.5 · 18,662 reviews - London Big Bus Hop-On Hop-Off Tour with Optional River Cruise
★ 3.5 · 10,803 reviews - London Small Group Tour of Historical Pubs
★ 5.0 · 10,422 reviews - Stonehenge, Windsor Castle and Bath with Pub Lunch in Lacock
★ 4.5 · 7,402 reviews
The practical exercise is the important part
The course includes a practical exercise exploring the effects of aperture and shutter speed. This is where the theory should start to make sense.
You will have the chance to change settings and compare the results. The value is not in taking a single perfect photograph. It is in seeing how one adjustment changes depth of field, motion, or exposure.
That hands-on element also gives the instructor a chance to spot common problems. A tutor can help if you are unsure which dial controls a setting, if your camera is using a different menu layout, or if the result does not match what you expected.
The format appears flexible enough to support questions. Pierre is described as making sure everyone kept up while answering queries, and Vehbi Koca is noted for using simple explanations and encouraging experimentation with different cameras. Those details matter more than flashy technical language in a beginner class.
You should still arrive ready to take part. If you only watch the instructor, the controls may seem clear for an hour and then vanish when you next use the camera alone. Change the settings yourself, compare the images, and ask about anything that still feels unclear.
Why the group size matters
A maximum of 12 people is a sensible limit for this type of class. Photography instruction can become frustrating when one tutor must rush between a large number of cameras, especially when each brand places controls in different spots.
A group of up to 12 is not a private lesson, so you should not expect constant one-to-one attention. Still, it offers a better chance to ask about your particular camera than a large lecture would.
The tutors’ teaching style is another strength. Vehbi Koca is described as clear, approachable, and willing to help no matter what camera a student brought. Pierre is described as patient when answering questions and helping the group keep pace.
Those qualities are useful because camera classes can easily become intimidating. You do not need to arrive knowing the vocabulary. You do need to be willing to handle your own camera and ask for help.
Meeting at Westland Place Studios
The class starts and ends at Westland Place Studios3, 11 Westland Place, London N1 7LP. It is near public transportation, and the activity returns to the same meeting point.
That makes the timing fairly easy to plan around. At about two and a half hours, the session can fit into a morning or afternoon without taking over your whole day. You can pair it with other London plans, but allow enough time to reach the meeting point without arriving flustered.
The location is in London rather than at a famous sightseeing viewpoint, so the main attraction is the instruction. If you are looking for a guided photo walk through iconic streets, this may not match what you have in mind. If you want focused time with your camera, the studio meeting point is more practical.
A mobile ticket is provided, which makes entry simple. Confirmation is received at booking, but you should still check the meeting details before setting out.
Is $95.80 fair for this photography class?
The price is $95.80 per person. That is not a throwaway activity, so the value depends on how much control you want over your camera after the class.
For a beginner who has been avoiding manual settings, the fee pays for structured teaching, a small group, practical application, and access to an award-winning photographer. Those are useful benefits if you are likely to keep taking photographs after your London visit.
The price is harder to justify if you already understand exposure, lenses, white balance, and manual operation. The course is designed for beginners, so experienced photographers may find much of the material familiar.
I would also consider the cost of wasted opportunity. A poor automatic photograph cannot always be fixed later, especially when the light or moment has passed. Learning how to choose settings before pressing the shutter can be worth more than buying another accessory you do not yet know how to use.
That said, no course can guarantee that every participant will become confident in a single session. You will get the best value if you practise after the class and keep the camera in your hands.
Who should book this experience
I would recommend Discover Photography to you if you own a DSLR or compact digital camera with manual settings and tend to use automatic mode. It is also a good choice if you understand a few camera terms but cannot yet connect them to the final image.
The course may suit you if you want to:
- Understand why your pictures look too dark, too bright, or blurred
- Learn how to control background sharpness
- Use your lenses with more purpose
- Move from automatic mode into semi-automatic or manual operation
- Ask practical questions about your own camera
- Build a base for better travel photography
The supplied information also includes an iPhone photography session, with instruction focused on what the phone settings do for images. That suggests the teaching may sometimes adapt to different equipment, but the main course information specifically says you need a DSLR or compact digital camera with manual settings to get the most from it. If you plan to bring a phone or a camera without full manual control, confirm suitability before paying.
Who may want a different activity
You may want another option if you are seeking a sightseeing tour, a long photo walk, or a class aimed at advanced photographers. The course description focuses on camera operation and a practical exercise, not on visiting a long list of London landmarks.
It may also be a poor fit if you do not own a camera with manual settings. You can perhaps follow parts of the explanation, but the main goal is to operate the camera and test the controls.
The non-refundable policy deserves attention too. Once booked, the experience cannot be changed or refunded if you cancel or request an amendment. If the provider cancels because the minimum number of participants is not reached, you are offered another date or experience, or a full refund. I would book only after checking your London schedule carefully.
The published minimum age is 18. The additional information also says children must be accompanied by an adult and both must have paid tickets, so families should confirm the age rule before booking.
Final verdict: a useful first step into manual photography
Book Discover Photography if you want a focused London class that explains the camera controls many beginners avoid. The combination of exposure theory, lens basics, composition, colour control, and a practical aperture and shutter speed exercise gives you a useful foundation in a manageable 2-hour-30-minute session.
I especially like the small group size and the emphasis on clear, patient help. Tutors such as Vehbi Koca and Pierre appear to treat questions as part of the class rather than an interruption, which is exactly what a beginner needs.
Skip it if you already shoot comfortably in manual mode or if you want a photo walk centred on London sights. For the right beginner, though, the course can turn a confusing camera into a tool you understand, and that is a useful souvenir long after the trip ends.
FAQ
How long does Discover Photography last?
The class lasts approximately 2 hours and 30 minutes.
Where does the photography course meet?
It starts and ends at Westland Place Studios3, 11 Westland Place, London N1 7LP, UK.
What type of camera do I need?
You need a DSLR camera or a compact digital camera with manual settings to get the most from the course.
What photography topics are covered?
The course covers lenses, composition, colour temperature, white balance, semi-automatic and manual modes, depth of field, aperture, shutter speed, focal length, angle of view, perspective, and exposure.
How many people can attend?
The activity has a maximum of 12 participants.
Can I cancel for a refund?
No. The experience is non-refundable and cannot be changed after booking. If the provider cancels because the minimum number of participants is not met, you are offered another date or experience, or a full refund.
Just added in London
- The Beatles and a Secret pub★ 4.5 · 36 reviews
- The Beatles & Liverpool Magical Mystery Tour from London★ 4.5 · 80 reviews
- Airport Coach Service from Heathrow to Oxford★ 3.5 · 67 reviews
- The Beatles Magical History Black Taxi Tour London★ 5.0 · 51 reviews
- The Beatles London walking tour. From Abbey Road to the Roof Top★ 5.0 · 61 reviews
- Private The Beatles Taxi Tour in London★ 5.0 · 12 reviews
- The Beatles London Walk★ 4.5 · 120 reviews
- The Alfred Hitchcock London Walk with Sandra Shevey★ 5.0 · 15 reviews
Photography Sessions, compared.
Professional Photoshoot in London Photographer
Read our review →
Browse the lists this tour appears in